Bringing New Life to Old Bricks
Reclaimed brick brings a sense of history, warmth, and nostalgia to any project. Whether you are building a patio, walkway, or feature wall, using old brick pavers can transform a space with their timeless charm. However, before you can enjoy their beauty, a little preparation is needed to clean and protect these well-worn materials.
Follow these simple steps to get your reclaimed bricks ready for use and to keep them looking beautiful for years to come.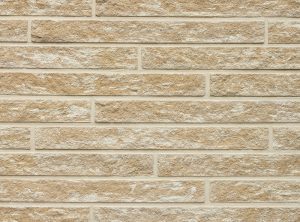
Step 1: Sort by Size and Shape
When working with reclaimed bricks, expect a mix of shapes and sizes. You might find full-sized bricks, half bricks, angled pieces, and even rounded edges in a single load.
Start by sorting your bricks into groups based on their size and shape. This makes it easier to plan your project and ensures you will have enough matching pieces to complete your design. While sorting, set aside any bricks with old mortar stuck to them, as these will need extra cleaning.
Step 2: Remove Stuck-On Mortar
To remove leftover mortar, use a mason’s hammer to gently tap away the hardened material. For particularly stubborn spots, you may need to repeat the process a few times.
After the major deposits are removed, scrub the bricks with a wire brush or a rubbing stone to smooth out any rough areas. Once finished, rinse the bricks thoroughly to remove any remaining dust and debris.
Step 3: Clean with Muriatic Acid
For a deeper clean, you will need to use a muriatic acid solution. Always perform this step outdoors in a well-ventilated area, and wear eye protection and rubber gloves for safety.
Mix a solution using three parts water to one part muriatic acid and pour it into a garden sprayer. Spray the tops and sides of the bricks with a sweeping motion and allow the solution to sit for about 15 to 20 minutes.
Step 4: Rinse and Repeat
After letting the acid solution work, rinse the bricks thoroughly with clean water. Make sure the runoff does not flow into storm drains or sensitive areas.
Next, flip the bricks over and repeat the spraying process on the other side. After another 15 to 20 minutes, rinse again with clear water.
Step 5: Inspect and Spot Clean
Allow the bricks to dry completely before inspecting them. If any stubborn stains remain, you can hand scrub smaller areas or reapply the muriatic acid to larger sections.
Keep in mind that some stains might be permanent due to the age of the brick. Rather than viewing them as flaws, embrace these marks as part of the brick’s story and character.
Step 6: Apply a Protective Sealant
Once your bricks are clean and dry, protect them by applying a sealant. This will help prevent future staining and make maintenance easier.
You can brush or roll the sealant onto the surface, depending on the size of your project. For larger areas, it is often easier to apply sealant after the bricks have been installed rather than treating each one individually.
Step 7: Maintain Your Brick Pavers
To keep your reclaimed brick pavers looking their best, regular maintenance is important. Pressure wash the surface once or twice a year using a mild detergent to remove dirt and grime without damaging the bricks.
With just a little care, your reclaimed brick features can continue to add beauty and history to your space for decades to come.