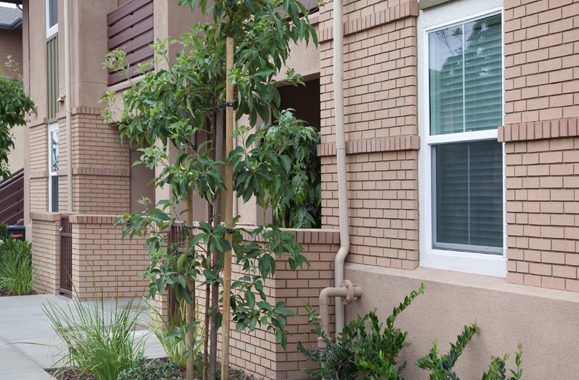
Interior and Exterior Guide to Install Thin Brick
Steps and Tips to Install Thin Brick Inside & OutThin brick provides the appearance of traditional brick without the depth and weight of full-size masonry. Successful thin brick installation depends on selecting the right installation system, preparing a suitable substrate, maintaining consistent mortar joints, and following applicable building codes and manufacturer instructions.
|
Key Takeaways
|

Interior Thin Brick Installation
Interior thin brick can be installed using a purpose-designed installation system or an approved substrate-and-mortar method.
Some systems use a prepared backer panel designed to hold thin brick in place before the mortar joints are completed. Factors to plan for include substrate compatibility, adhesive application, and curing.
For conventional installations, cement board may provide a stable, uniform substrate when the selected system permits its use. Verify that the substrate, mortar, and bonding method are compatible with the thin brick product and the intended application.
Exterior Thin Brick Installation
Exterior thin brick installations require additional attention to moisture management, drainage, flashing, and weather exposure.
Some systems use a backer panel installed over an approved wall assembly. The system is designed to support mortar-bonded thin brick and incorporate water-management features. Installation speed and performance depend on the project conditions.
Before starting an exterior project, you will need to determine whether a drainage plane, water-resistive barrier, flashing, or other moisture-control components are required. Use only approved materials and accessories, and ensure that the complete wall assembly is suitable for exterior exposure.
Thin Brick Installation Techniques
Proper layout, substrate preparation, mortar selection, and joint finishing all contribute to a durable, professional-looking thin brick wall.
1. Prepare the Substrate
The substrate must be sound, stable, clean, and compatible with the installation method.
Cement board may be suitable for certain interior and exterior applications, but it is not appropriate for every wall assembly. Select the correct board and supporting structure for the location, and follow the board manufacturer’s requirements for fastening, seams, waterproofing, and exterior use.
2. Plan the Brick Layout
Running bond is a common thin brick pattern. In this layout, each course is offset by approximately half a brick from the course below.
Measure the wall before installation and plan the layout around corners, windows, doors, and ceiling lines. Adjust the starting point and joint spacing where permitted to minimize narrow cuts and achieve a balanced finish.
For walls that meet a ceiling, plan the top course to avoid unnecessary small cuts where possible. Apply the same approach to openings and wall ends.
3. Establish Level Courses and Consistent Joints
Fasten a straight, level guide along the base of the wall to support the first course. Check alignment as you work and use chalk lines at regular intervals to maintain level courses.
A mortar joint of approximately 3/8 inch (10 mm) is common, although the specified joint width depends on the brick product and installation system.
Tile spacers may help maintain consistent spacing where appropriate, provided they are compatible with the system. Follow the manufacturer’s recommendations for joint dimensions and placement.
4. Select the Appropriate Mortar
Choose a mortar approved for the thin brick, substrate, and installation method. Masonry Products sells many different types of mortar, and we can recommend the ideal mortar for your thin brick system.
Mix and apply the mortar using the specified method and allow adequate curing time. If an approved adhesive is used, verify that it is suitable for the application; some construction adhesives are restricted to interior use.
5. Install and Cut the Thin Brick
Set each brick according to the selected installation system, maintaining the planned pattern and joint spacing. Check alignment frequently and correct inconsistencies before the mortar or adhesive sets.
A masonry or brick saw can provide clean, accurate cuts around corners, openings, and wall edges. Equipment is available for sale at Masonry Products.
6. Fill and Finish the Mortar Joints
Once the brick is securely installed and the system permits jointing, fill the joints with the specified mortar. A mortar bag can help place mortar accurately while reducing excess material on the brick faces.
Allow the mortar to reach the appropriate stage for tooling. When it is firm enough to hold its shape but still workable, use a jointing tool to create the specified finish, such as a concave joint.
Remove excess mortar using the recommended cleaning method and timing. Avoid aggressive cleaning or methods that could damage the brick surface or disturb the joints.
7. Allow the Installation to Cure
Protect the installation from conditions that could interfere with bonding and curing, including unsuitable temperatures, excessive moisture, or premature disturbance.
Follow the product instructions for curing times, environmental conditions, and when the wall can be exposed to normal use or weather.
Practice Before Installing Thin Brick
For DIY projects, practicing on a small test panel can help refine brick placement, cutting, joint filling, and tooling. Use compatible materials and follow the same procedures planned for the finished wall.
Review the relevant thin brick technical guidance and the complete installation instructions for your chosen system before beginning. Careful preparation and attention to detail help produce a consistent finish and reduce installation errors.
Click Here for the Source of the Information.
Ready for a Consultation?